linux学习7,解决gdb错误,单步调试内核
发表于: 2018-12-08 15:40:15 | 已被阅读: 1012 | 分类于: Linux笔记
前四节介绍如何定制自己的 linux 内核,以及如何利用 busybox 制作文件系统,如何使用 qemu 模拟器运行编译好的 linux 内核。上一节介绍了在没有界面和鼠标的 linux 环境下,如何使用 gdb 工具单步调试程序。linux 内核也可以看作是一个程序,所以本节将尝试使用 gdb 单步调试 linux 内核。

记得第二节在 linux 内核源码中添加了一行打印自己名字的代码,内核也确实在启动时打印了名字,不过这对于调试 linux 内核源码来说,还是不够过瘾,能够一行一行的单步调试 linux 内核代码才叫酷。
单步调试 linux 内核源码的方法
可是,怎样单步调试 linux 内核呢?要知道,单步调试需要操作系统的支持,而要是想单步调试,linux 系统就不能完全启动,这就有点像想拉着自己头发,把自己提起来的感觉。的确,这种方法比较难实现,不过编译好的linux内核不是使用 qemu 模拟运行的吗?qemu 是运行在我自己的 ubuntu (下文称为宿主机)上的,那么使用宿主机来调试 qemu 模拟运行的 linux 内核就是一个不错的选择。
gdb 支持远程调试,恰好 qemu 也支持,那调试方法就清晰了:先用 qemu 加载 linux 内核,留出远程调试接口,然后在宿主机上使用 gdb 工具连接 qemu 留出的调试接口,这样就能在宿主机上使用 gdb 调试 qemu 中模拟运行的 linux 内核了。
qemu 在模拟运行 linux 内核时,加上 -gdb tcp::1234 -S 参数:
qemu-system-x86_64 \
-m 512M \
-smp 1 \
-kernel ./bzImage \
-drive format=raw,file=./disk.raw \
-append "init=/linuxrc root=/dev/hda" \
-curses \
-gdb tcp::1234 -S
执行后,linux 内核不会启动,而是会停在下图这个界面,等待 gdb 远程连接。

# gdb linux-2.6.26/vmlinux
...
Reading symbols from linux-2.6.26/vmlinux...done.
(gdb) target remote:1234
(gdb) b start_kernel
Breakpoint 1 at 0xffffffff807dba50: file init/main.c, line 536.
不同于一般的 C 程序,linux 内核的入口函数不是 main 函数,而是 start_kernel 函数,即 linux 内核从 start_kernel 函数开始运行,所以我们在此处下断点。然后,输入 c ,会发现另一个终端里的 linux 内核启动了,
(gdb) c
Continuing.
Remote 'g' packet reply is too long: 2090...
(gdb)
但是,gdb 好像没有正常工作,输出一大堆混乱的字符,如下图。

解决 gdb 工具调试 linux 内核时的不正常
gdb 为什么不正常工作呢?既然 gdb 是开源的,那问谁都不如问源码,于是下载了 v8.0 版本的 gdb 源码,解压,搜索“Remote 'g' packet reply is too long”,应该能够发现出现这种现象的原因。
如何下载 gdb 源码就不赘述了,不会下载的朋友在评论区留言,我发过去。
果然,还真搜到了。
# tar xf gdb-8.0.tar.xz
# grep -r "Remote 'g' packet reply is too long"
gdb/po/gdb.pot:msgid "Remote 'g' packet reply is too long: %s"
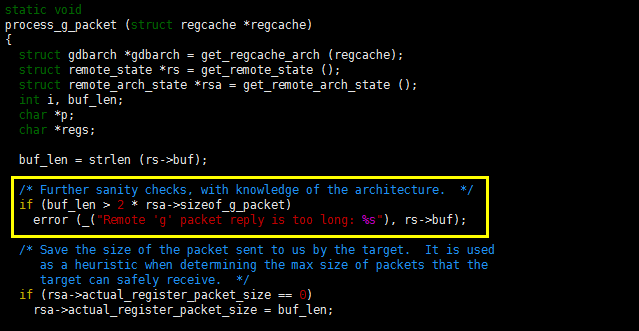
gdb/remote.c: error (_("Remote 'g' packet reply is too long: %s"), rs->buf);
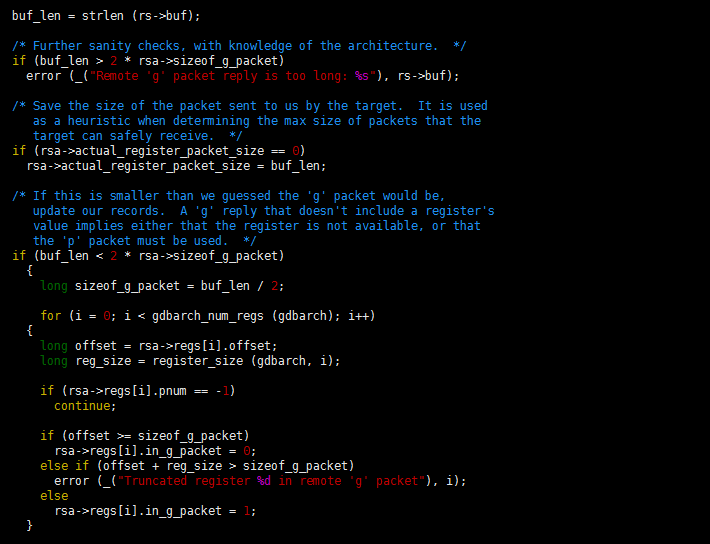
打开 gdb/remote.c,找到报错代码段:
# mkdir ../install      # 安装在此
# ./configure --prefix=<你的install绝对路径>
# make
# make install
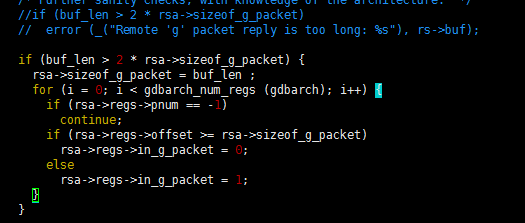
因为宿主机自带的有 gdb 工具,所以为了不与原 gdb 冲突,我们将新的 gdb 工具安装在 install 目录,安装完毕后,我们再使用新的 gdb 工具调试内核试试。
使用修复错误的 gdb 工具调试 linux 内核
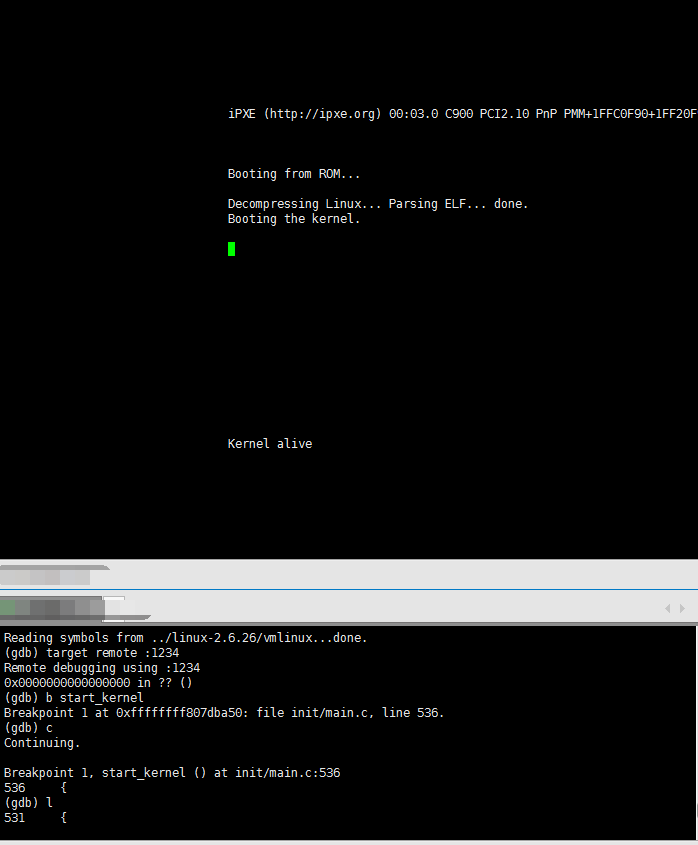
使用新编译好的 gdb 工具,重复上面的步骤:
# ./install/bin/gdb ../linux-2.6.26/vmlinux
...
Reading symbols from ../linux-2.6.26/vmlinux...done.
(gdb) target remote :1234
Remote debugging using :1234
(gdb) b start_kernel
Breakpoint 1 at 0xffffffff807dba50: file init/main.c, line 536.
(gdb) c
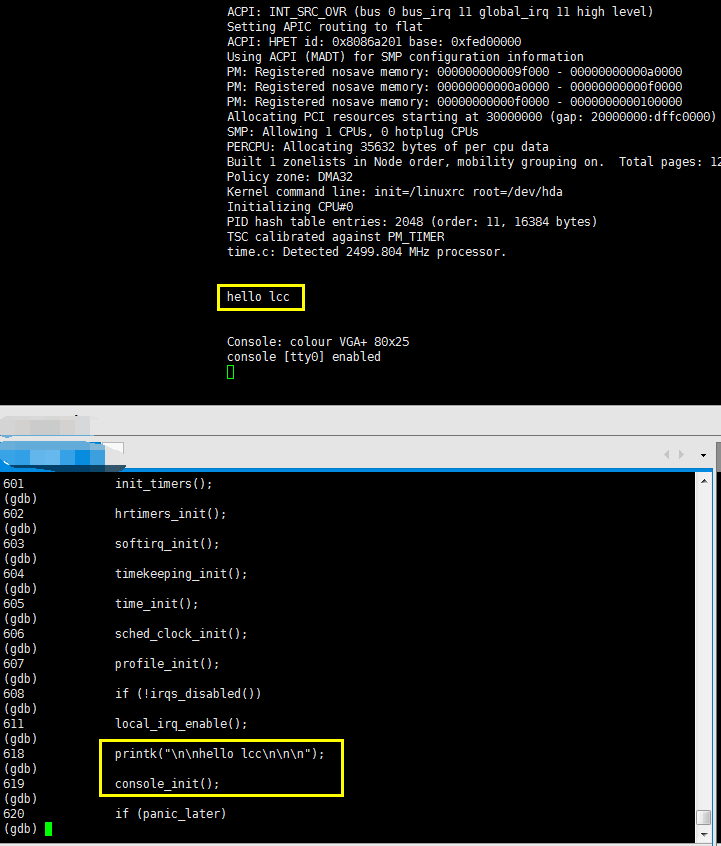
输入 c,gdb 果然没有继续报错,而是停在了 start_kernel 处,如下图:
(gdb) n
540     smp_setup_processor_id();
(gdb) n
547     lockdep_init();
(gdb) n
551     local_irq_disable();
(gdb) n
559     lock_kernel();
(gdb) n
560     tick_init();
(gdb) n
561     boot_cpu_init();
(gdb) n
563     printk(KERN_NOTICE);
(gdb) n
567     setup_command_line(command_line);
...
发现 start_kernel 函数里其实就是很多模块的 init,此时虽然有 printk 函数,但是终端依然还没有信息被打印出来: